How to Solve Yard Drainage in Broken Arrow, OK
A sudden Oklahoma downpour can turn a beautiful Broken Arrow lawn into a swampy mess. If you’re tired of soggy grass, standing water, and a yard you can’t use for days after it rains, you’re not alone. The unique combination of heavy rainfall, dense clay soil, and often flat terrain in our area creates the perfect storm for yard drainage problems. Fortunately, there’s a time-tested solution that can reclaim your outdoor space: the French drain.
This guide will walk you through why a French drain is an ideal solution for Broken Arrow homeowners. We’ll cover what it is, how it works, and the practical steps for installing one to permanently solve your water woes.
Why Broken Arrow Yards Have Drainage Issues
Understanding the root cause of your soggy yard is the first step toward fixing it. In Broken Arrow, a few key factors work against us.
- Heavy Rainfall: Oklahoma storms are no joke. They can dump a massive amount of water in a very short time, overwhelming your lawn’s natural ability to absorb it.
- Clay Soil: The soil common in this part of Oklahoma is heavy with clay. Clay particles are very fine and pack together tightly, which prevents water from draining through it efficiently. Instead of soaking in, water pools on the surface.
- Flat Terrain: Many properties in our community are relatively flat. Without a natural slope, water has nowhere to go. It simply sits in low spots, creating stagnant puddles that can kill grass and become a breeding ground for mosquitos.
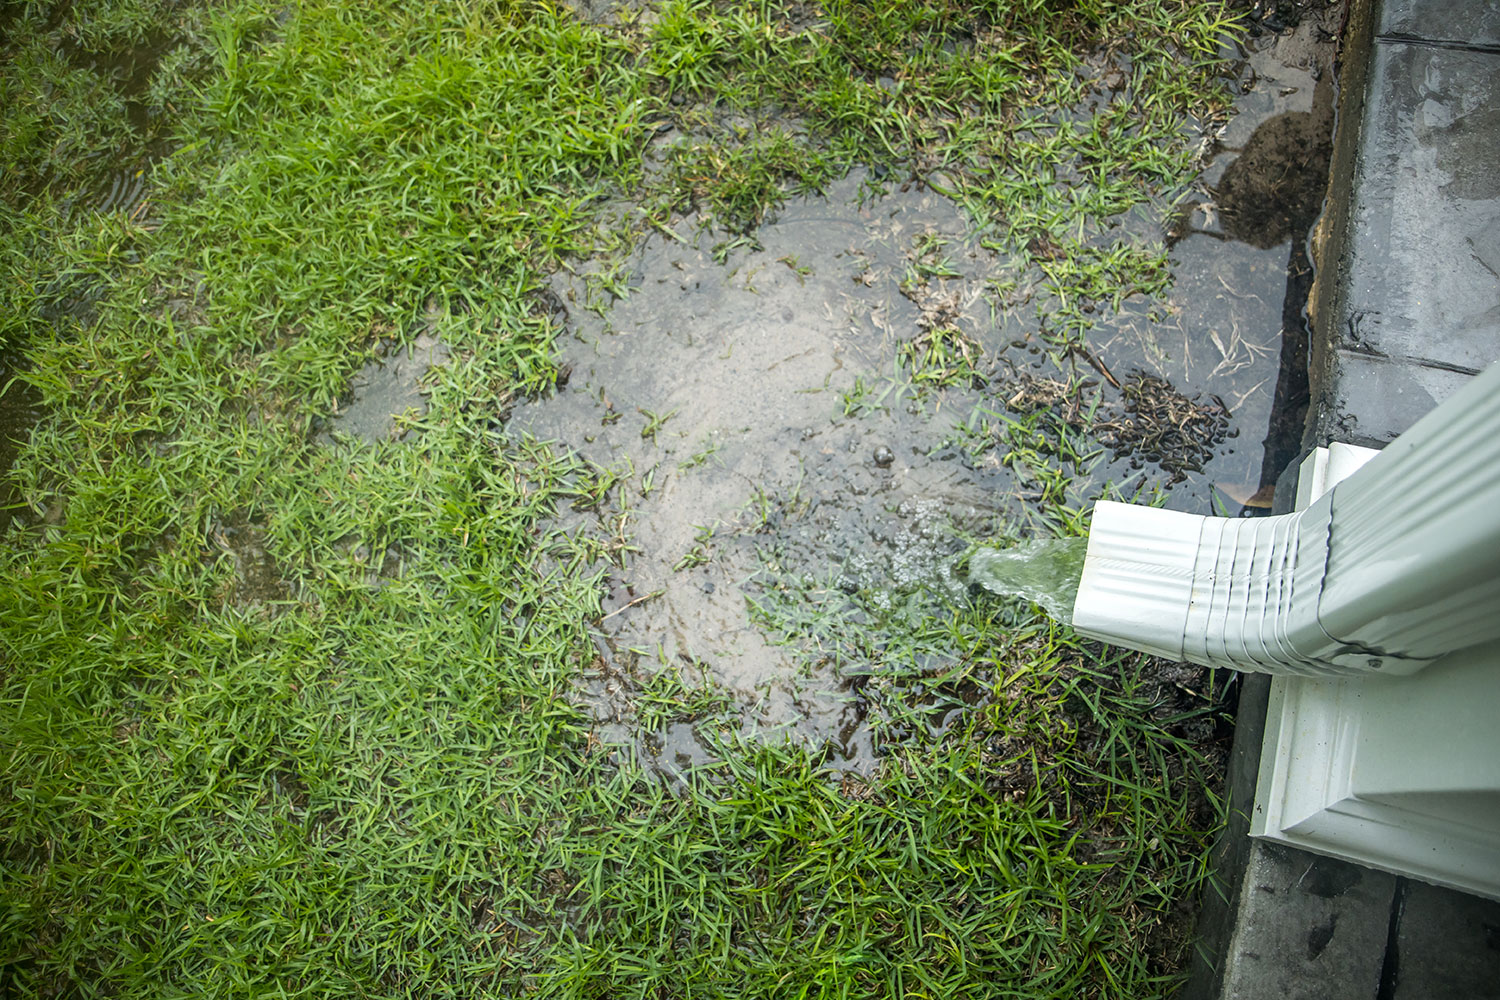
These issues combined mean that water collects on your property and stays there, leading to foundation risks, plant root rot, and a muddy, unusable yard.
What is a French Drain and How Does It Help?
A French drain isn’t a drain you see on the surface. It’s a clever underground system designed to collect and redirect groundwater and surface water away from a problem area. It consists of a slightly sloped trench filled with gravel and a perforated pipe.
Here’s how it works:
- Water Collection: Water in the soil always seeks the path of least resistance. The gravel-filled trench provides an easy channel for water to flow into.
- Redirection: As water enters the trench, it flows into the perforated pipe at the bottom.
- Removal: The pipe is installed at a slight angle, using gravity to carry the water away from your yard to a suitable exit point, like a storm drain, a dry well, or a less critical area of your property.
For Broken Arrow’s specific challenges, a French drain is effective because it doesn’t rely on the soil itself to drain. It creates an artificial, highly efficient drainage path right where you need it most.
Installing a French Drain System: A Step-by-Step Guide
Installing a French drain is a labor-intensive project, but it’s manageable for a dedicated DIYer. Here are the essential steps to follow.
Step 1: Assess Your Yard and Plan the Layout
Before you dig, you need a solid plan. Go outside during or right after a heavy rain and observe where water pools. Identify the highest point of the problem area and the lowest point where you want the water to exit. This will determine the path of your trench.
Your trench should run through the soggiest parts of your yard, creating a path for water to follow. Plan for the drain to terminate in a safe location, such as a curbside drain or a runoff area at the edge of your property. Always call 811 before you dig to have underground utility lines marked.
Step 2: Dig the Trench
This is the most physically demanding part of the project. Using a shovel or a rented trencher, dig a trench that is about 6 to 8 inches wide and 18 to 24 inches deep.
The most critical part of this step is creating a consistent, gentle slope. The trench must slope downward toward the exit point to ensure water flows correctly. A good rule of thumb is a 1% grade, which means the trench should drop about one inch for every 10 feet of length. Use a level and string line to maintain your slope as you dig.
Step 3: Add the First Layer of Gravel
Once the trench is dug, pour a 2- to 3-inch layer of drainage gravel (like crushed granite or river rock) along the entire bottom. This gravel base provides a stable bed for the pipe and improves water flow into the system.
Step 4: Install the Pipe and Fabric
Lay a perforated drain pipe on top of the gravel base. You can use flexible corrugated pipe or rigid PVC pipe with pre-drilled holes. If using a pipe with holes on only one side, place it with the holes facing down. This allows water to enter from the bottom as it rises in the trench, which helps prevent clogging.
To protect your system from silt and soil, it’s highly recommended to wrap the pipe in a water-permeable landscape fabric. This “filter fabric” acts as a barrier, stopping dirt and roots from getting into the pipe while letting water pass through freely. You can either wrap the pipe itself or line the entire trench with the fabric before adding any gravel.
Step 5: Fill the Trench with Gravel
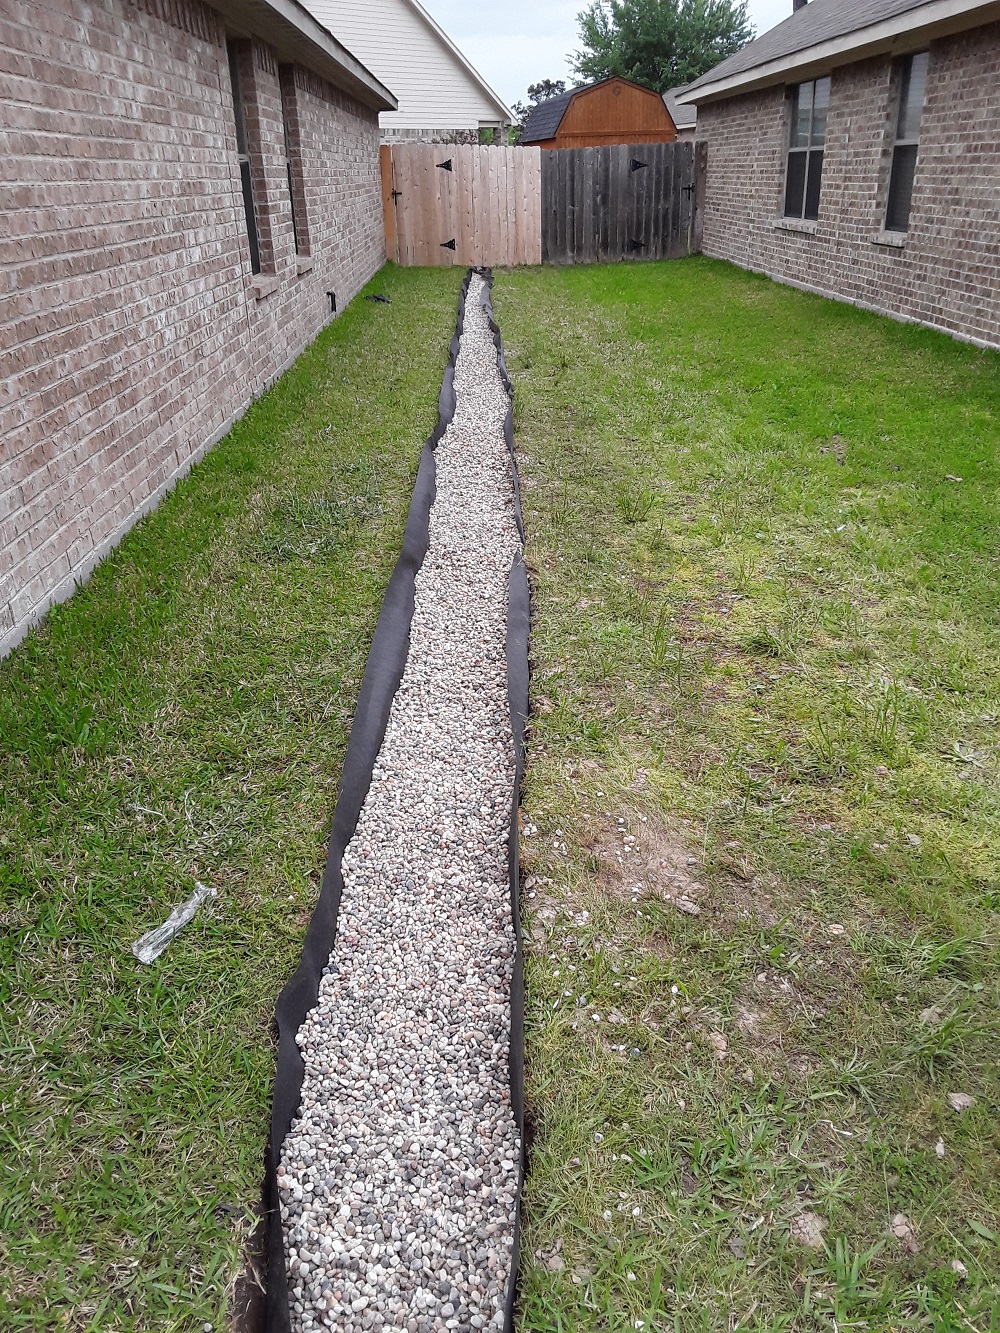
With the pipe in place, fill the rest of the trench with gravel, leaving about 4 inches of space at the top. The gravel is the primary drainage field, so be sure to fill it completely around the pipe.
Step 6: Finish the Surface
For the final step, you have a few options. You can fold the excess filter fabric over the top of the gravel to create a final barrier against debris. Then, cover the gravel with a layer of topsoil and plant grass seed or lay sod to make the drain disappear into your lawn.
Alternatively, you can fill the top few inches with decorative river rock for a more visible, low-maintenance finish that doubles as a landscaping feature.
Maintaining Your French Drain for Long-Term Success
A well-installed French drain requires very little maintenance, but a few simple checks can ensure it works effectively for years.
- Keep the Exit Point Clear: Regularly check the outlet of your drain to make sure it isn’t blocked by leaves, grass clippings, or other debris. A clogged exit will cause water to back up in the system.
- Avoid Planting Deep-Rooted Trees Nearby: Tree roots are naturally drawn to water sources and can grow into the pipe, causing blockages. Avoid planting large trees or shrubs directly on top of or near your drain line.
- Monitor for Slow Draining: If you notice your yard is becoming soggy again, it could indicate a clog in the system. In some cases, a professional may need to use a drain snake or hydro-jetting to clear the blockage.
By installing a French drain, you can take control of your yard’s drainage issues and turn a waterlogged lawn into a healthy, beautiful, and usable space for your family to enjoy, no matter what the Oklahoma weather throws at you.
Benefits of Installing a French Drain
French drains provide a practical and effective solution to manage excess water on your property. By redirecting water away from your yard or foundation, these systems help prevent standing water, soil erosion, and even structural damage to your home. Beyond functionality, they can also improve the overall health of your lawn by preventing waterlogging, which can suffocate grass and other plant life. Whether you’re looking to protect your home, enhance the aesthetics of your yard, or both, installing a French drain is a valuable investment in your property’s future.
Contact us: 918-557-3058